Friday, March 2, 2012

Recap of Nina and Ryan's Fall Wedding

This past week I was finally able to breathe again…planning and executing my daughter’s first birthday party is behind me now, leaving me with a little bit of breathing room for the next few days.

Today’s blog is a recap of a wedding I coordinated last fall. Nina and Ryan’s wedding was truly special for me because of Nina’s Persian background that she wanted to incorporate. This, along with some budget and etiquette help, is what spurred her to work with me. We spent 14 months planning the big day…14 months that I won’t forget! Nina was such a warm and funny person to work with. It really helps when I get to know my brides and grooms and we become friends throughout the planning process, and this is what happened with Nina. It really allowed me to integrate her and Ryan’s personalities into all aspects of their wedding day.

Nina chose a subtle peacock theme for the day, because she loved the bright colors and it tied in quite well with the feathers on her gown.


Note the feathers in the bouquets – they just give it something extra!

What an awesome belly dancer! This was definitely a first for me but it has become more and more common.

LOVE this candy bar – dried fruit, nuts, and Wockenfuss chocolates. Probably shouldn’t admit it…but I was definitely sneaking a few tastes!

Sweetheart table…notice the peacock feather peeking out from under the menu!

Nina and Ryan had a jazz band that played during the cocktail hour. They were fantastic and I would totally recommend them to future brides.

Nina, you and Ryan are a great couple, and I wish you many more years of happiness. Congratulations again to the both of you!

Thanks to the vendors who helped make this day special:
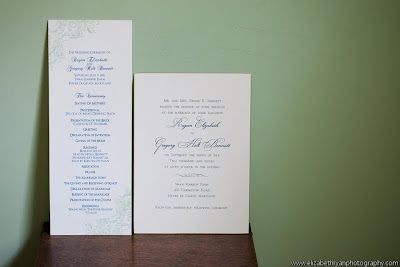
Stationary and Invitations – MLC Designs
Florist – The Floral Studio
DJ – Beat 2 Beat DJ’s
Engagement Photos – Marcellaneous Photography
Wedding Photography – JS Productions Photography


Thursday, February 16, 2012

Photo Contest Giveaway


Robert Holley, a photographer that I really enjoy working with, is giving away 4 engagement sessions!

Enter the contest here: http://unbouncepages.com/engagement-promotion/

Good luck!

Tuesday, January 31, 2012

Planning a party...Part Three!

If you've followed parts 1 and 2 of my party planning tips, you'll know that we've covered everything from themes and invitations to centerpieces and food choices. Now that we're coming down the home stretch, with Cadence's first birthday party in less than two weeks, I've been working on the little details that'll make this party look polished and creative.

I teamed up with mlc designs again (they designed the beautiful invitations) to create labels (pics after the party!)for the various cupcake flavors that I baked with a friend a few weekends ago. I also picked out some props for the photo booth - this is a great way to keep older kids occupied, and a fun way for everyone to remember the party when they look through their pictures later. I also made a welcome sign (love these).

I ordered multi-colored polka dot straws from etsy a few days ago - perfect for the cupcake theme. Once they arrived, I thought they could use a little something extra. I found a Word template online for tags to go on the straws...and it was so easy! Once I picked out a template, I just typed in what I wanted them to say, printed them on white card stock, folded them in half and glued them to the straws. Voila....simple, cute, and perfect for any occasion! I definitely recommend doing this for your next party. Looks difficult, but it really didn't take long to do.
Now is when you want to begin going through your necessity list...you know, the essentials. Plates, napkins, flatware, ice, etc. It's better to go over everything two weeks in advance instead of at the last minute. I'm also writing thank you tags, ordering party hats, and making "wish" cards - another personal favorite of mine. Guests are going to write notes to Cadence, which I'll save for her. :)

Keep emailing me your questions about budgeting, etiquette, and decorating! Looking forward to sharing the cupcake displays and signage in a few days.

Thursday, January 26, 2012

Planning a party...Part Two!

This past weekend I had two focuses: centerpieces and decorations (step 6, mentioned last week), and goody bags - step 7.

So, picking up where I left off...

Step 6: Figure out decorations. I think that centerpieces can really brighten up a table and add some *flair* to your party. There are so many different things you can use as a centerpiece...flowers, candles, books, balloons, you name it.

Remember this cardinal rule...you need to be able to see over or under whatever you're placing in the middle of the table, so that guests can easily see and chat with each other! It's simple to figure out: set your elbow on a table, point your hand up and make a fist. Short centerpieces should not go above your hand; tall centerpieces should be similar in height to the picture below.


There's nothing more frustrating that having guests move a centerpiece to the floor just so they can see each other...it's such a waste!

For Cadence's party, I'm going with white roses and baby's breath in blue mason jars - something I already have in my collection. Pretty and inexpensive!


Step 7: Favors. These don't need to be expensive! People associate favors with $$$, but that's not always the case. Carryout-style boxes for leftover cake and food are cute and can cost as little as $0.10 each!

I purchased 6"x6" white boxes for Cadence's party - 100 of them for $35...total cost of only $0.35 each! Although I'm not using all 100, I can always use them in the future! I'm planning on filling them with random cupcake-related items I found on Amazon...lipgloss, rubber duckies, notepads, etc. I'm going to wrap the boxes in solid color paper and tie them with polka dot ribbons.


Anyway, more on last minute details next week. Feel free to email me with specific questions!

Tuesday, January 17, 2012

Planning a party...on a budget!

I have to be honest...although planning weddings and experiencing the joy of different cultures and traditions is my passion, I really really love it when someone comes to me for help with planning a birthday party.

First of all, lose any assumptions you might have. Many people think it takes a lot of time and money to plan and execute a polished party, so to keep it simple they get out the paper plates and plastic flatware and tie a bunch of balloons to a chair (bo-ring).

I'm in the midst of planning my daughter Cadence's first birthday party (!!) and we're doing it on a budget. So, as I go through various planning stages, I'm going to share my tips on how to throw an awesome party - for any occasion - without breaking the bank.


Step 1: Determine your budget. It's important to figure this out ahead of time. You don't want to be two weeks from the date and realize that you've spent most of your budget on invitations, with little left over for food and drinks. I suggest allocating a percentage for each category, and then determining the actual dollar amount. That way it's really easy to figure out whether you're on track.

Step 2: Pick a date and book a venue. If possible, do it at your house - that way there's no site fee.

Step 3: My favorite step...pick a theme! I decided on a cupcake theme because they're yummy, pretty, and feminine. Perfect for my little girl's birthday.

Step 4: Choose your invitations. I knew I wanted to spend a little more here because I loooove pretty invitations. I sent out the ones for Cadence's party this week! Check them out below. They're from the talented mlc designs. I just love them!


If you'd rather focus your budget on other areas, send out personalized e-vites (that match your theme of course!) to friends and family. Greetings and Readings, along with Papyrus, has great stationary at budget-friendly prices.

Step 5: Figure out the food and drinks, and try to make most of it yourself. This is a big area for you to save! It's much less expensive to cook everything at home versus hiring a caterer for the party. You can also ask friends to bring their favorite dishes.

Since our theme is cupcakes, what better food to have at Cadence's party than cupcakes?? To save money, I baked them this past weekend with a friend. Crazy? Definitely. We made 216 cupcakes in one day, and I'm freezing them to keep them fresh for the party.

Check out the cupcake wrappers on the left. I got them from Amazon.com. Inexpensive and cute! If you're really into DIY, you could try making your own wrappers. Check out a tutorial here.


That's a lot of cupcakes!


Step 6: Choose your decorations. This is where I am right now in my planning! Still trying to decide between centerpieces, linens, etc.


More here on this next week, and on planning during the home stretch. Last-minute decorating, going through the RSVPs, and more. I'll share how my frozen cupcakes are holding up. Hoping everything will taste great and freeze well!

Tuesday, January 10, 2012

2011 Recap...the little things

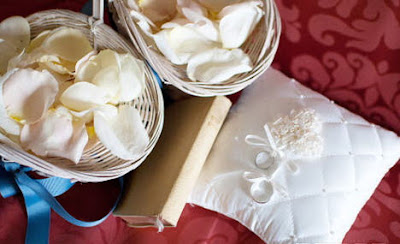
As many of you know, it's the little things that really make an event look put together and polished. From place cards and menus, to flower petals strewn down a ceremony aisle...all of these details are key to pulling off a beautiful wedding. That said, they're also easy to overlook!

Here are some of my favorite "little" details that made my 2011 weddings so beautiful.


~~~~~~~~~~~

Chad Lippiatt Photo

~~~~~~~~~~~

Merkle Photography


~~~~~~~~~~


~~~~~~~~~~~

Borrowed Blue Photography


Thanks to everyone involved in all of my weddings from 2011. It was truly a memorable year!

Friday, December 30, 2011

The funky nail trend...we're lovin' it

Okay ladies, this post is for the adventurous brides and bridesmaids out there: cool and creative nail designs that you can do by yourself.

I'm still a big fan of the traditional French manicure for weddings, but more and more I'm seeing fun, unique nail patterns and colors worn by brides and their maids. So I figured I'd surf the net and show you my favorite DIY nails. Even if you don't use these on your wedding day they're still fun to try for a night out!

iheartdaily.com

We at eventi planning love us some polka dots. So easy too! Just use a thin paint brush for the dots after letting the base dry.

thebeautydepartment.com

O.M.G. I am smitten. Tree lights....how awesome would this be for a wedding right around X-mas? I wish I had seen this a few weeks ago...I would have done this for a holiday party. We love thebeautydepartment.com because they have great tutorials!

howto.getmarried.com

Perfect for a vintage wedding...Apply a few coats of nude, tan, or light pink polish and then press newspaper against nails while they're still damp. Tres chic!

diynailartdesign.com.

Love how the pinky and pointer are different than the other fingers. Check out diynailartdesign.com for tons of nail ideas.

thebeautydepartment.com

Candy corn...perfect for late October weddings or parties. Thanks again to thebeautydepartment.com for this gem.


makeupalley.com.
If you're like me and not that adept with a nail brush (I'm working on it!), go with glitter polish for extra glam. All of us at eventi are in love with OPI Holiday Glow. It's a gorgeous color for fall and winter.

Send me pics of your creative nails, regardless of when you rocked 'em! We'll post them here for additional inspiration!

Happy New Year everyone!